
I have decided to undertake the construction of a sweep boat. In deciding upon our years' epic Spring trip we have the possbility of many miles of flatwater, and I think such a vessel will be more interesting than just sitting in a duckie paddling along.
Advantages of this system are that it will be more social, more fun, more of a team effort with two bodies required to row it. Also the ability to cook and sleep on the thing while floating will take out camp set up, cooking, and break down time, allowing us to cover more ground faster.
After thinking about it alot and sketching various designs on paper I built a scale model. Dimensions I settled on are 8 feet wide by 20 feet long. For flotation I have a combination of 6 X 56" heavy truck inner tubes, as well as two to three tributary tomcat tandem inflatable kayaks. For my model I scaled it down to 1/1th size. Most of the porportions are right, with the notable exception of the wood I used for the oar lock mounts, the main floor, and the two main structural supports under the vessel. This was inevitable as it was built out of scrap. The basic porportions and connections, however, are about right.
The whole thing is designed to be held together with cam straps and rope, so it can be completely disassembled for transportation without a trailer.
Ideally it would look something like this:


Building the frame, you've got two long structural supports, which I think might be 2" X 6" boards, or possibly 2" X 8" inches. Across them go the three main cross boards, forming a grid.
 >
>
This is the core of the structural integrity, and will be held together with six 1.5" 6 foot long cam straps. There are holes drilled through the long pieces and the cross pieces where they meet that the straps go through, as well as being wrapped around. This helps for structure now, but will become even more important later.
Now of course it is very hard to find, much less transport, an 8' X 20' piece of flat wood. So the scaleded down piece in this model will have to be cut up to simulate the real life project of building decking out of 4' X 8' plywood, which will probably be 1" on the full model.

In the full size the upper left, upper right, bottom left, and bottom right pieces will be 4' X 7'. The center pieces will each be 4 ' X 6'.
To add more support, I then add cross supporters to each side of the main side supports to make a more stable craft.

Using 2" X 8" X 8', or 2" X 10" by 8' wood for this in real life would be stronger, but I think the supports are so numerous I will be able to get away with using 1" thick wood. I don't think I need to drill holes through the joints here, just waving the role around the joint should hold it strong enough. I line up the boards and make sure they fit.

For oar locks I could go for something nice like this, and affix it to a wooden post and use real metal oar locks.

However, I am also planning to make some homemade oars, and I worry they may not fit in regular oar locks. This leads me to favor a more traditional, and simple design:

Rope, a cam strap, or bungie cord can be put over the top of this to keep the oar in place in rougher water. Also, in the above photo note the many holes drilled into the floor. That allows you to drain water, but more importantly you can tie the floor boards to the frame as seriously or as simply as you like, depending on what kind of trip you are embarking on.
The diagonally extending piece here that the lock sits upon is connected to the support piece with screws and held strong together. Then there are holes drilled into the support piece. These are threaded through the floor, and through the main structural support under the floor. Additional holes drilled through the floor itself allow for the rope to be run through and cross woven across the support to hold it in place.
Here, we come to a problem. The boat as it is constructed now will do great in flat water. It is very, very stable. However, if it its a rapid the downstream end will rise up over it and then crash down. That strain can break the main foundation wood piece. Furthermore, it is difficult (though not impossible) to transport 20' long pieces of wood. Also, having the supports that long means I will always have to completely re and disassemble the boat each time I use it.
I thought about maybe sawing the boat into the three modules, based on where the floor meets, and connecting the pieces with some kind of heavy hinge like this one:

That would allow the three modules to flex up and down with the waves. It would also allow you to break down the single 20' long structural pieces into folded back against themslves pieces with a maximum length of only 7' long. However, two problems remain. One is that you still must dissassemble the frame entirely to transport the boat, and another is that most rapids don't simple lift the bow of your boat up. You hit things from the side a lot, and that will stress the hinge in a way it won't like, causing it to eventually rip out. There must be a better way, something with more flexibility, sort of like the human shoulder's ball and socket joint.
So I came up with this:

You've got a heavy duty eye bolt on each end, and the twine symbolizes a carabiner holding them together. This allows flexability in all directons.
I decided to try it out but I needed to come up with flotation. I got some empty dog food tins, put them in a ziplock to keep the water tight, and taped that on there.

Now keep in mind the porportions of tins are a lot more vertical and a lot more uneven than what inner tubes or duckies would be. Whatever problems the design will have floating balanced in real life are going to be seriously exaggerated in the trial of this model.
Lets put it in the tub:

Even allowing for problems with diverting from true scale, that is a very serious instability. The oar lock mount here is weighing it down unevenly, but even some one moving gear or walking around on it in real life could do something like this, which we can't have.
I like that the design is modular. And I like that it is flexible. But right now it is too flexible. What it needs is something like tendons and cartiledge. So I came up with the idea of usinge a plank across the boards, held in place with tightly wound bungee cords, connected to each other and / or running through eye bolts drilled into the sides of where the main supports meet so they don't slide out. This will allow the plank to move up as waves want it to, but not too high. As soon as they are passed, the bungee pulls the plank bank down getting us stable again.
For the model I simulated this with a piece of wood placed over the joint and held together with tape.

Lets see how that floats

While there is some minor bending, that is probably exaggerated on the model. Even so, it is definately an improvement and one that we could work with while continuing to improve on. Best of all, to transport the boat now all that needs be done is have the flotation detached, the plank unbungeed and the caribiner taken off. Essentially you just stack up the thre large pallets you have built on top of each other. Throw the oars on the side, and put the flotation on top of that. Most of the time this won't be run on whitewater anyway. If you ever did, you'd need to really avoid getting a foot caught in the joints. Rigging dry bags and coolers on either side of the joint as in a traditional whitewater raft triple rig will help keep feet out of there as well as to prevent clam shelling.
Oars
Oars are big and expensive. Even with wholesale pricing you are going to spend $35 for a cheap oar plus another $40 or so for the blade. And you will need at least 3 oars. Not worth it. Wandering around lowes and home depot I found these super thick wooden dowels. They had them in lengths well beyond the 11 to 12 feet I'd like.

You take one of those and stick it in a 1.5" or 2" PVC pipe. You can even have a wheelbarrow handle coming out the handle end for a more traditional look. Fill the space between the pipe and the wood with caulking, wood glue, or spray foam (cheapest). Then saw a slit in the end where you want the blade. Stick your wodden blade in there and drill in holes. Secure with big thick bolts. Replace blades as needed.
Floatation
Right now I am thinking one tube under the top and bottom of the middle pieces. One tube under the top and bottom of each end pieces (6 total tubes). For better stability and protection from sharp impacts, attach one tributary tomcat underneath each end. You can still pop a side tube on those things by hitting a pointy rock at a high impact but that is unlikely on flatwater with small rapids. It will certainly be a better protection than just the tube, and it will make you more stable as well. Where the frame rests on the tubes or duckies I will put towels or carpet down first to limit chafing. Ideally styrofoam dock flotation, more duckies, or several rafts would be better for this. But those things are more expensive and I cannot afford them.
For the deck you can get crazy and due whatever you want. Put a bunch of tie down loops for gear. Build a kitcken. Put a sofa on it. Put poles and guy wires for a tarp- tent across the middle if it gets stormy. Whatever you want.
For wood I'm thinking something light but strong. There is a lot of incised pressure treated wood that would probably be the best thing to use. Alternately maybe redwood would be nice, but that is a lot heavier.
Next step is to buy the actual materials. Then assemble it in the yard. Then float it at Ken's lake. Then work out kinks and try a maiden voyage.
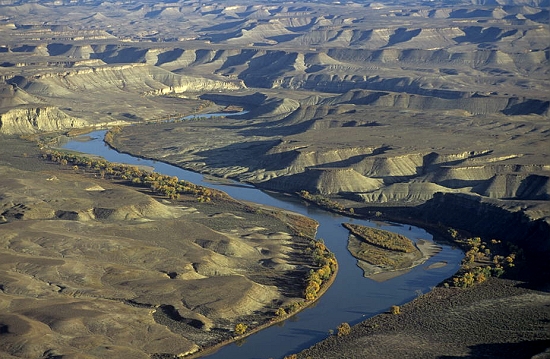
The key river streches I have in mind for this are the Green River through the Uinta Basin, the Green River from the town of Green River, Utah to the confluence with the Colorado River, the Colorado River from Cisco to the Confluence, and the Colorado River from below Glenwood Springs to Westwater (while making two portages). Running Deso with it would be fun and allow you to do a truley epic trip, but I think there are some places that would give you some trouble. Particularly I'm thinking of Three Fords, Cow Swim, and Coal Creek Rapids.
Also, I like the side mounted oar locks in the old timey image at the top of this article. That would allow you to move down stream to make more time. Maybe I will add them later. But for now there is no means of propulsion but the river, and you just move side to side across it.